Painting Flowers with Acrylics

Acrylic painting is a great art medium for budding artists. It is a versatile paint and is forgiving so is good for all levels and abilities.
In this guide to painting acrylic flowers we talk through different techniques for creating depth and texture in a painting including colour mixing, layering of colours and how to add tone.
Using the Zieler 24 pack of acrylic paints this set comes with a great variety of coloured paints. This set is ideal for beginners because you don’t have to worry about mixing to many colours yourself. Using the mixed media brush set, which has a great range of sizes and shapes of brush.
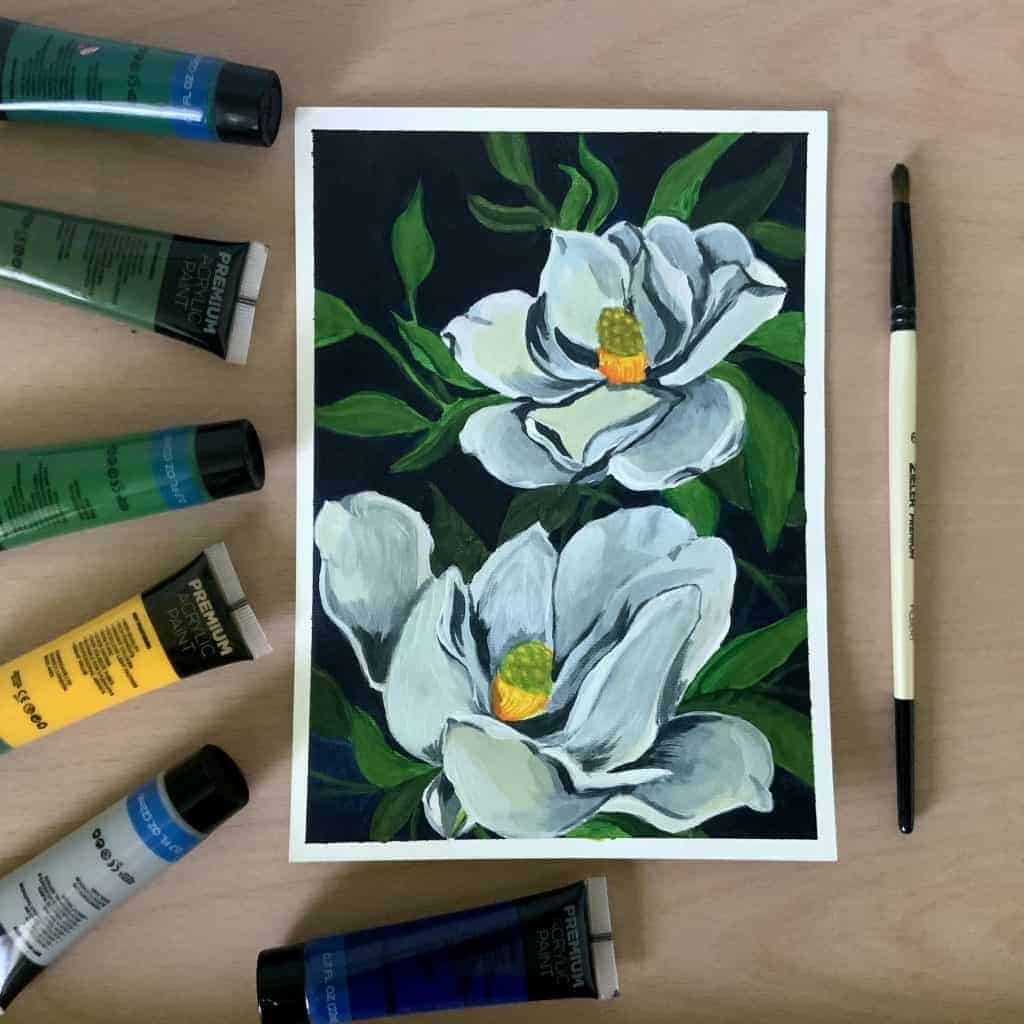
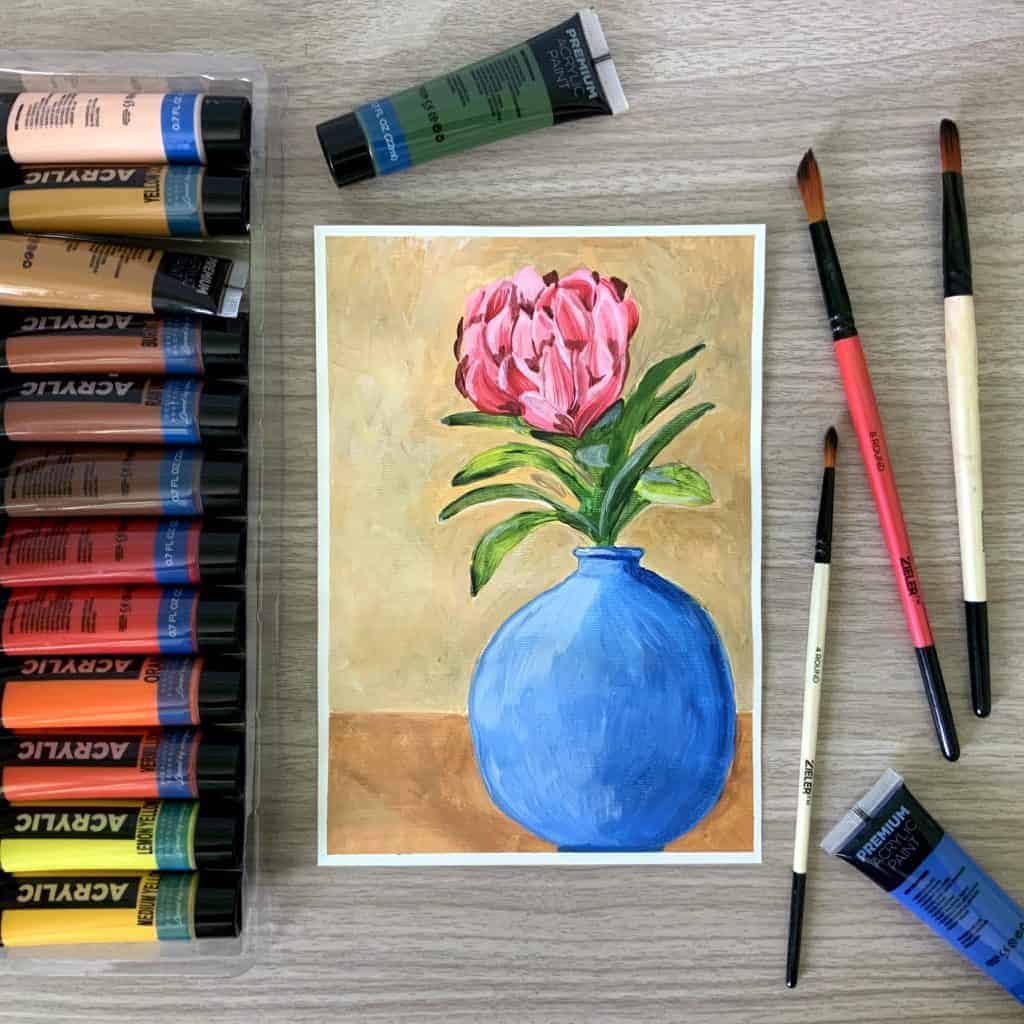
In this guide we talk through techniques from two different flower paintings, a Magnolia and Protea flower. Showing two different styles of painting.
Flower inspiration
Painting flowers is a great introduction into painting and its easy to create pretty pieces of artwork. Simply choose a picture to work from or even collect flowers from your garden.
Starting off with a simple sketch or outline of your image, using a HB pencil draw onto your acrylic paper. Remember if your a beginner or not confident in your drawing skills its ok to trace the image.
Using masking tape to secure your paper to a hard surface this will create a nice neat white boarder for your artwork when removed at the end.

watch the video to see the process
Layers and tones
Acrylic paint is perfect for layering tones and creating areas of light and dark. To add contrast and give depth to a painting.
In the magnolia flower the petals are a white colour so the light and dark areas of the petals are created buy using grey and blue colours. Cobalt blue and ultramarine, use these colours to block in the darker areas of the petals. Leaving this layer to dry and then add a layer of diluted white paint to create a softness in the petals. The darker colour shows through underneath the white.
Top tip – when using a lot of white or diluting the paint its important to use clean water, this will stop the white from becoming discoloured or muddy.
Protea Flower
With the protea flower head the tone has been created using a one brush stroke technique by layering colours onto the brush.
For this its the way you load the brush with paints. In the protea example mix crimson red with white to create a pink colour, add a bit of water to give the paint a nice flow. Then using a round brush size 4-6 load the brush with this mixture. Then add a very small amount white to the tip of the brush and a very small amount of crimson to the very tip of the brush.
Applying the paint to the petal shape, drag across starting with the bottom of the petal with an upwards motion. The layers of paint on your brush will create a colour gradient effect. This technique is also used for the leaves, the order of the colours used is emerald green diluted, sap green and lemon yellow.
watch the video to see the process

Backgrounds
Adding a background can enhance a painting and add depth. With the magnolia image the background is very dark painted by blending phathlo blue and black paint.
Using the paint wet on wet and blending directly onto the paper. Use a round brush to outline the leaves in dark colours then this will enhance the white colours of the magnolia petals. With the protea flower head the background is a much lighter colour but contains a lot of tonal gradient so its looks like a realistic wall.
Using raw sienna mixed with yellow ochre the first layer applied loosely using larger flat brush and is left to dry. Then using a smaller flat brush diluted raw umber is mixed with the raw sienna and applied by dabbing the brush on the page to create a textured effect.
Adding details
The finishing touches or fine details to the painting will bring the painting to life. For example in the magnolia piece adding sap green veins to the leaves using a size 0 round brush give them a more realistic look. Using orange and mid yellow for the centre of the flower again using the spotter round brush layering wet on wet dots creates the texture of the middle of the flower.
In the protea flower adding crimson on a small size 2 round brush, paint in the darker section of the flower head. This is the points between petals and the outer petals. Then finish by adding finer details like highlights using a diluted white to add areas of light.

Finishing
Leave your work to dry before removing the masking tape
Top tip- If you make any mistakes acrylics are forgiving, you can leave it to dry then paint over the area. If you are covering up a dark colour with a light colour this might take a few layers. So be patience when waiting for layers to dry and remember practice makes perfect it might not turn out perfect on your first attempt.
See more guides here

Paint By Numbers Guide: 9 Steps to Creating Your Masterpiece
Paint By Numbers Guide: 9 Steps to Creating Your Masterpiece Table of Contents Welcome to the world of paint by numbers! This fun and
9 Things You Should Know About Gesso
9 Things You Should Know About Gesso and How You Should Use It Table of Contents 1. What is Gesso? If you are starting out
An Introduction to Acrylic Paint & How to Get the Best From It
An Introduction to Acrylic Paint & How to Get the Best From It Table of Contents Loved by artists and crafters all over the world,
Acrylic Varnish Spray: The Best Way to Protect Your Art Paintings
Acrylic Varnish Spray: The Best Way to Protect Your Art Paintings Table of Contents As an artist, we know you have taken great time and

30 Minute Masterpiece – Still Water Reflection
Still Water Reflection Welcome to the 30 Minute Masterpiece with me Trish Green – Artist Ambassador at Zieler. I am a self-taught artist aiming to
Art Portfolio Presentation Case – Product Guide
Zieler’s Art Portfolio Presentation Case & Art Folder – An All-In-One Solution! Imagine an art case that can double up as a portfolio case. One

