An Introduction to Acrylic Paint & How to Get the Best From It
Table of Contents
Loved by artists and crafters all over the world, acrylic paint owes much of its popularity to its sheer versatility. It can be used on a myriad of surfaces such as wood, fabric, metal, plastic, glass, paper and more.
To get long-lasting results is to appreciate the basics of how acrylic paint works. Knowing this we are better equipped to understand how it performs on different surfaces.
We will discuss how to optimise the use of acrylic paint on canvas and wood as well as highlighting its limitations on non-porous surfaces.

What is Acrylic Paint and How Does It Work?
1. Pigment
These are tiny, separate particles that give the paint its colour. By themselves, these particles are insoluble so will not pull together; therefore, a ‘binder’ is needed. Some pigment colours like black are more opaque than others such as yellow. This explains why darker colours often require less coats of paint than lighter ones.
2. Binder
Acrylic paint consists of acrylic polymer particles which perform the task of pulling together (binding) the pigment particles. In doing so, they form a covering within which the pigments are locked in.
It is during this process that the paint transforms from being wet (non-permanent) to dry (permanent).
When the polymers are wet they are a milky white colour, but when dry they are clear. This explains why acrylic paint is lighter in colour when wet and darkens as it dries. Acrylic polymer particles naturally pull together – which you want, but only once you have finished painting. Until then something is needed to delay this process and that something is…
3. Water
You will often hear how acrylic paint is water-based making it safer and more friendly to work with than oil paint which is toxic and solvent-based. It is the water content that makes acrylic paint quick-drying compared to oil paint. The water keeps the acrylic polymer particles separate from one another thereby forming a liquid emulsion. This gives the paint its paste-like texture which is essential for moving and mixing it before it dries.
When you have finished painting the emulsion is left alone; the water from it will evaporate (some of it may also be absorbed by the surface) causing the acrylic polymer particles to pull right together and trap the colour pigments whilst doing so. The result will be a clear and durable paint film.
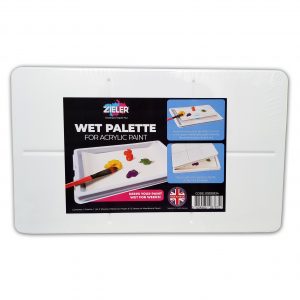
TIP: In order to help stop your acrylic paints drying out before you are ready consider using an acrylic paint palette. This works by having a damp sheet evaporate through a membrane sheet which the paints sit on. By keeping the paints hydrated their life
is significantly prolonged meaning you can stagger your painting over many days and even weeks.

Whilst acrylic paint palettes are not cheap they can save you money by not having dried up and unusable paint on your palette – so they are perhaps worth the investment. The Zieler acrylic palette includes multiple moisture sheets and provides ample space for your paints.
Types of Acrylic Paint
There is a plethora of acrylic paint brands available. They range from professional artist quality paints, containing more pigment in them, to cheap versions containing far less pigment, stuffed with a filler and more water. Too much water in an acrylic paint will weaken the ability of the polymers to bind causing the paint to be more susceptible to cracking and flaking over time
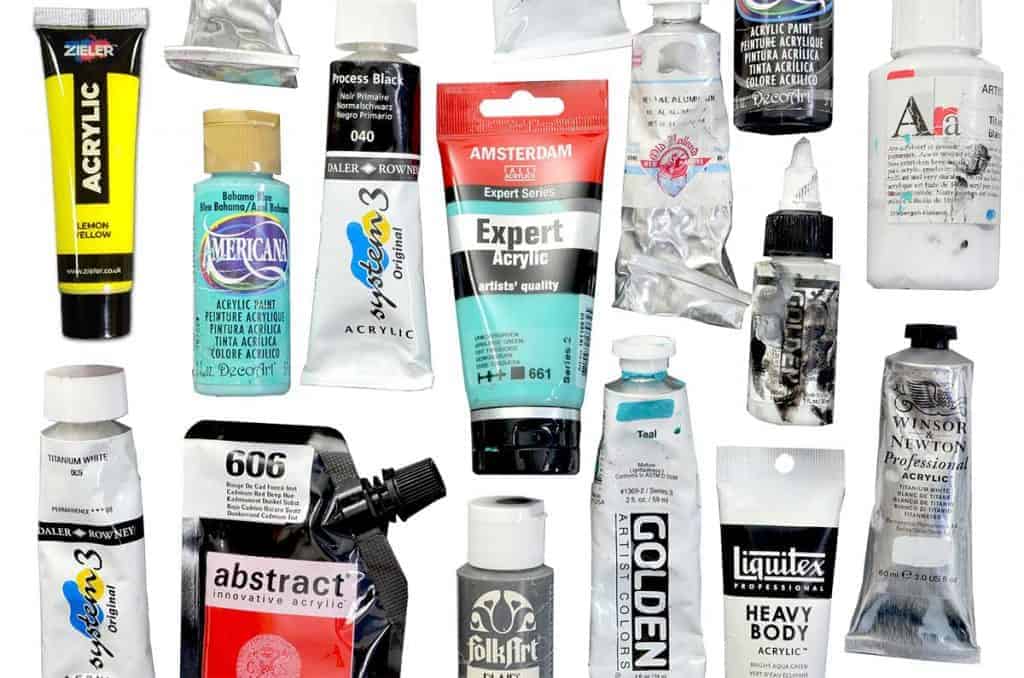
The middle ground is student quality acrylic paint which represents a good starting point for budding and intermediate level artists. In fact, many professional artists use student grade paints for large parts of their paintings. Acrylic paints differ in their density. Mediums can be used to make them thicker (so they behave more like oil paints) or thinner (so they are more akin to watercolour).
Why Does the Behaviour of Acrylic Paint Matter to Me?
There are three reasons:
(1) Whilst acrylic polymers stick to a wide range of surfaces, they stick to some better than others. In some cases, you will want to ensure that your surface has sufficient ‘tooth’ for the polymers to stick to. Without ‘tooth’ you risk your paint (no matter how good it is) eventually cracking, flaking or peeling off.
(2) If you have a porous (absorbent) surface, acrylic paint with its water content can seep into it. You may need a foundation that will prevent this from happening so that your paint sits on your surface and does not bleed into it.
(3) It will give you a better appreciation for whether to consider using an acrylic medium or a gel to thicken or thin your paint. Acrylic mediums can be used to add more body to your paint by adding more polymers to your paint so effectively reducing the proportion of water in the overall mixture. There are also mediums that will thin your paints without compromising the quality of the paint (as it would if you just added water). Note: Adding acrylic medium or gels to your paint will cause a colour change as the colour pigment is being diluted so your paint will become more transparent the more medium you add.
Some artists like to use acrylic paints so that they behave more like watercolours. In this case, the above will not apply because you will (1) want your surface to be absorbent and (2) to thin your paints with water – both are necessary in order to create watercolour effects.
Choosing Acrylic Paints

You can buy the most expensive professional acrylic paints available (and there are some expensive ones out there!) yet still end up with sub-standard results if you fail to prepare your work properly. Conversely, you can achieve fantastic and long-lasting results with a good student grade acrylic paint if you take the time to prepare your surface properly and protect your artwork from the elements. Let’s be clear, professional quality paint is superior to student quality – of course it is. The point is other factors beyond paint quality will play a big part in determining your finished painting result.
Cheap acrylic paints tend to contain a higher degree of water and filler with less pigment. This makes more them susceptible to cracking and flaking. Some early artists will use these paints purely for practice work. Economically, this makes perfect sense, but as you develop and improve as an artist you will want to step it up. Not only are poor quality paints going to give your artwork a shorter life span, they are unlikely to blend and layer as it you will want. Zieler acrylic paint is formulated to a high-grade; it is a medium body, student acrylic paint with good pigment. These characteristics mean the colours are vibrant and its consistency works across most surfaces without needing to thicken or thin them.
Below we will discuss the use of acrylic paint on:
- Canvas
- Paper
- Wood
- Fabric
- Glass
- Plastic
- Metal
How To Use Acrylic Paint on Canvas

Canvases are perhaps the most popular surface used with acrylic paints. They come in a range of sizes and are easy to display on walls.
When painting on canvas, like any surface, ensure that it is free of any dust by using a dry brush.
Canvas can be purchased raw in which case it will need to primed numerous times to protect it from the paint. The majority of artists use canvas that is pre-primed – the white canvas that most of us are familiar with.
Priming your canvas is essential.
The key things to note when painting with acrylic paint on canvas is the need to (1) prepare the surface with gesso beforehand and (2) consider applying a spray varnish after your painting is finished and dry.
Both will have a dramatic effect on your results.
You can learn more about gesso and how to use it on canvas here.
You can learn more about spray varnish and how to use it here.
How to Use Acrylic Paint on Wood
Generally, water will penetrate through wood so you will need protection against this. It is worth noting that the surface of some woods like MDF is more absorbent than that of oak for example. In any case, unless the wood you have has already been primed, you will need to lay down a good foundation before painting.
When painting onto unprimed wood you are looking to achieve all the four things below before you apply any paint:
- A surface that is smooth
- A surface that is sufficiently protected against water penetration (sealed)
- A surface that has a binding structure that the acrylic polymers from the paint will be able to grab onto. For this we need to prime the wood.
- After painting is complete and dry that your work is protected against elements suchas dust and moisture.
Note: If your wood is lacquered or varnished it means it has been sealed. Because this surface is non-porous, it will not lend itself well to the adhesion of acrylic polymers. If you try to paint straight onto it your finish will be poor (see below) even if you are using the best artist paints.

Therefore, you will want to follow the process below when painting onto all types of wood.
1. Getting a smooth surface

It’s always better to sand a little first, brush away the dust and check the state of your board before deciding if more sanding is required.
TIP: If your wood is grained you will get a better finish if you sand in the direction of the grains and not against them.
Any wood that has been sanded or that is unprimed will have its pores open. These need to be closed by sealing the wood which is the next step.
2. A surface that is sufficiently protected against water penetration (sealing the wood)
If your board is going to be exposed to water then protecting it will be crucial. Even if it will not have to contend with water, you will still want to seal the open pores of the wood before applying your primer.
PVA glue can be used to seal your wood. Though PVA glue is white in colour it dries clear – and fairly quickly too. The glue should be brushed thinly across the wood’s surface as you want achieve a smooth finish.

On one hand, this will easier if the PVA is diluted with water (though only to a maximum of 50% water); on the other hand, using it undiluted is preferred as PVA glue, such as Zieler’s, is already water-based to begin with. By applying it in its thicker, undiluted form it will dry faster. It will also offer better protection as much of the water contained in the PVA glue has escaped into the air (evaporated) with less penetration into the wood.
One downside of applying the PVA undiluted is that it is likely to result in some brush marks; these can be easily smoothed out with very gentle sanding once the glue has dried.
Once the glue has been left to dry and is gently sanded. Ensure any shavings are discarded using a soft dry brush.
It is advisable to apply a second coat of undiluted PVA in the same way as the first layer.
3. Priming the Wood
Priming is necessary for two reasons to help protect the surface of the sealed wood from the acrylic paint that will be applied on top of it and to provide a surface with grip for the acrylic paint to adhere to. Gesso is a water-based acrylic medium that is used for priming. Because it contains very fine sand-like elements it dries matt and with a good amount of ‘tooth’ for the polymers in the acrylic paint to grip on to. Gesso is normally white in colour though is available in other colours like black, grey and clear. You can learn more about gesso here.
Just like the application of PVA glue, you want to brush the Gesso thinly onto the surface and you will want a smooth surface. If you do end up with some uneven patches these can be sanded out gently after the gesso has fully dried.
Tips: Use a soft nylon brush or a foam brush to help give you a smoother application. You may want to avoid hard brushes like bristle. For larger surfaces consider using wider brushes as this will save you time.
It is advisable to prime the wood three times ensuring that it is dry before the next layer is applied.
Now that you have a solid foundation with good grip you are ready to start applying paint to it. The paint should sit nicely on the gesso as shown below.

4. Using Acrylic Paint on Paper
To achieve long-lasting results and protection from elements such as light, dust and moisture you should consider protecting your finished painting with an easy-to-apply varnish. You can learn more about spray varnish and how to use it here.
Using Acrylic Paint on Paper
Acrylic paints are ideal for paper though you will need a paper that can withstand the weight and texture of the paint. As the paper is an absorbent surface it should be primed before any painting takes place. This reduces the chances of the paint soaking into the paper and ruining your work.
It is advisable to use paper that is designed for acrylic painting as it is most likely to have been pre-primed. Zieler’s acrylic paper pads contain textured, 260gsm sheets which have been primed.

It is worth applying additional primer to your paper just to be safe in the knowledge that your paper is well protected. Acrylic-based gesso is ideal for this.
Using Acrylic Paint on Fabric

Acrylic paints can be used on fabric, but they do have some limitations that you should be aware of. Let’s consider how acrylics compare with fabric paints which tend to be the better option in many cases.
Though similar to acrylic paints (in that they are water-based and quick-drying), fabric paints are more absorbent into the fabric. This means they flex with the material which is important for comfort if the fabric is something that is going to be worn. Acrylic paints, on the other hand, sit on top of the material making it more stiff once the paint has dried. This stiffness makes the paint more susceptible to cracking and flaking if the material is heavily and repeatedly flexed.
When using fabric paint you will need to apply heat to your material (once the paint has dried) in order for the paint to be permanent. This can be done by running an iron or a hairdryer on the reverse of the material. Because fabric paints are not permanent until heated, any mistakes made during painting can be easily rectified by simply wiping away the paint.
Acrylic paints do not need to have heat applied to the fabric. They are permanent once dry – though flexing of the material may cause the paint may to crack or break off.
Fabric paints are designed to be washable with little or no effect on the painted surface or colours. It is not advisable to wash materials that have been painted with acrylic paints.
So in summary, acrylic paints can be used on fabrics, but are better suited to projects that will be for decorative purposes and not need to be regularly flexed or washed. They offer an advantage over fabric paint in that they do not need heat to make them permanent.
Acrylic paint pens are good alternative to ordinary acrylic paint tubes. Many people find that they can achieve greater accuracy and work faster with a pen than they can with a brush.

Using Acrylic Paint on Fabric

On non-porous surfaces acrylic paint tends to move about and lack consistency. However, additional layers (especially for lighter colours) will help create more opacity. Spray varnish will help seal the paint without which it may flake away.
Note: it is not advisable to varnish any part of an item which will be in contact with your mouth. So, if you are decorating a glass which you will be drinking from, for example, you should be painting the outside of the glass and applying some masking tape to the area where your mouth will touch the glass. After painting, spray varnish can then be carefully applied to outside of the glass and the masking tape then removed.
If your aim is to paint the entire surface, such as the whole of a plate, acrylic paint will work better if the plate is first layered with white gesso primer (a few layers are recommended). Your acrylic paint will then sit better on the surface. A spray varnish can then be applied to seal your work – though, again, not if the item is to be used for the consumption of food or drink.
In most cases, enamel paints are a better alternative to acrylic paints. Enamel paints are specially formulated for painting on non-porous surfaces and are available in both oil-based and water-based versions. They are designed to adhere to surfaces such as glass and metal with a durable finish that is less likely to flake off. They do not require a primer but for optimum results an enamel-based primer can be applied.
The downside of enamel paints is the colour choice tends to be limited in comparison to acrylic paints. They also give off more odour – especially the oil-based versions. For this reason, some prefer to use with acrylic paints instead.
Whether you use enamel-based paint or acrylic paint, apply a few coats of clear protective varnish to your glass if you intend to have it outdoors.
Using Acrylic Paint on Plastic

Applying gesso layers beforehand an applying multiple coats of acrylic paint will give you an improved results. However, an enamel-based paint is the better option especially if the plastic is to be flexed.
If your plastic is thin consider using a water-based enamel paint as it is less abrasive then oil based versions.
Can I use Acrylic Paint on Metal?
Summary
View more Acrylic paint guides:

Paint By Numbers Guide: 9 Steps to Creating Your Masterpiece
Paint By Numbers Guide: 9 Steps to Creating Your Masterpiece Table of Contents Welcome to the world of paint by numbers! This fun and
9 Things You Should Know About Gesso
9 Things You Should Know About Gesso and How You Should Use It Table of Contents 1. What is Gesso? If you are starting out
An Introduction to Acrylic Paint & How to Get the Best From It
An Introduction to Acrylic Paint & How to Get the Best From It Table of Contents Loved by artists and crafters all over the world,
Pouring Art on Different Surfaces
Pouring Art On Different Surfaces DIY home decor ideas and inspiration using pouring art techniques. Fluid pouring art is a fabulously fun and easy way
Acrylic Painting Stay Wet Palette
Acrylic Painting Wet Palette Using acrylic paint is fun and suitable for all abilities, however it does have one major problem, it dries too quickly.
Flower Painting with Acrylic
Painting Flowers with Acrylics Acrylic painting is a great art medium for budding artists. It is a versatile paint and is forgiving so is good

