Artist gesso consists of white pigment (titanium dioxide), white chalk (calcium carbonate) and a ‘binder’ – normally acrylic polymer in water. Gesso literally translates to “ditch plaster”, which refers to its traditional use – as an inexpensive white paint (consisting of animal binder) used to cover walls in poor Medieval homes; it was pounded into ditches and then smoothed out over the wall surface.
Nowadays, it is used commonly as the foundation to prepare canvas and other surfaces for painting
2. Is Gesso Necessary?
There is a temptation amongst beginner artists to start painting without using gesso. After all, applying gesso (as we will soon find out) can be a time-consuming exercise and canvas can be purchased pre-primed. Even still, applying gesso is a worthwhile task.
Gesso is the medium that provides an even painting surface. When dry it forms a ‘tooth-like’ texture for acrylic or oil paint to leave the brush easily and for it to adhere better to canvas or other surfaces. Without gesso there would be nothing to prevent your wet paint seeping straight through the fibres of a canvas or any other absorbent surface.
Gesso provides the protective barrier between the paint and the surface.
Canvas, by its very nature, is not a smooth surface due to its weaves. If your canvas is raw you must prime it with gesso a few times before painting otherwise all your painting effort will be a complete waste of time and money. Even if your canvas is pre-primed you should consider applying additional layers of gesso.
Not only will your paint sit better on a well-primed surface, but your colours will appear more vibrant. With a solid foundation in place, the life span of your artwork is increased.
Gesso can be used to protect and enhance surfaces such as canvas, paper, wood and board -making them less absorbent and smoother.
If you plan to use oil or acrylic paints on any absorbent surface, you should apply gesso before doing so. Oil paints, in particular, will penetrate unprepared (or insufficiently prepared) surfaces easily due to their solvent-based properties.
Note: If you are painting with watercolours, gesso will not be required. This is because you will want your surface to be able to absorb the water in order to be able to mix colours and water.
3. Types of Gesso
To appreciate the different qualities of acrylic gesso it is worth understanding the function of each of its key ingredients.
- Titanium Dioxide – this is the pigment which gives the gesso its white colour.
- Calcium carbonate – this is the chalk (sand-like granules) that gives gesso the ‘tooth’ that is vital for your paint to grip onto.
- Acrylic polymers in water – as the water evaporates the polymers have nothing to separate them so lock themselves together. In doing so they trap together the pigment and calcium carbonate particles. This process is known as ‘binding’. Once all the water has evaporated the polymer has created a film; it is this film that forms the foundation on which you apply your oil or acrylic paint.
The key to a good quality gesso is the right balance between these main ingredients. Be wary of the cheap gesso which tends to be watered-down and contain less acrylic polymer, pigment and chalk. This will have two adverse results:
- More time and gesso will be wasted as more layers will be required.
- The film that is formed will not be sufficiently stable and so will be susceptible to cracking and flaking.
Artist and professional grade gesso contains a better balance of polymer, pigment and chalk and thereby offers superior stability, durability and opacity. This means you can expect to achieve better and long-lasting painting results.
Gesso is a medium you are likely to get through quickly when you are applying multiple coats of it and/or working on larger canvas pieces. This often makes the professional quality gesso, as good as it is, uneconomical.
When developing our Zieler® gesso we took all these factors into account to carefully create an affordable, artist-quality, acrylic-based gesso that can be used straight or diluted.
We worked closely with our UK manufacturer and our artists to ensure our gesso gives a high-opacity, a matt white finish with good ‘tooth’.
4. Can I Use White Acrylic Paint Instead of Gesso?
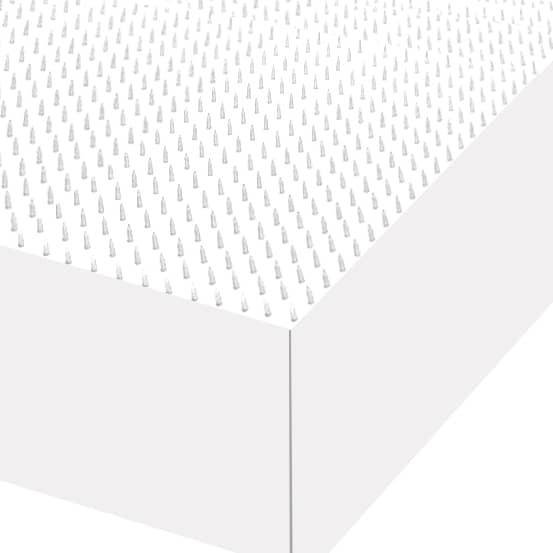
Substituting white acrylic paint for gesso sounds possible – both contain white pigment and
acrylic polymer. However, once it dries acrylic paint results in a more ‘slippery’ surface than
gesso. Consequently, your paints will have less ‘tooth’ to grip onto. By contrast, gesso with
its titanium dioxide will give you the necessary surface ‘tooth’ – as depicted and magnified
below
5. Do I Need to Gesso my Canvas if it is Pre-Primed?
Priming raw canvas several times is an absolute must, but what about canvas that has been pre-primed (often with 3 coats of gesso) at the factory?
The common conception here is that the canvas is ready for use. Whilst this may be the case, canvas is woven meaning a good number of coats are required to make it even. Also, we do not know the quality of the gesso that has been used at the factory.
As a general rule, therefore, it is prudent to gesso your pre-primed canvas at least once – more if you plan to use oil paints. This will give you optimum results.
Applying gesso becomes more important when working on larger canvases where there is more chance of slight surface imperfections that may need smoothing over.
6. Can I Dilute Gesso with Water?
Gesso varies in density across the many different brands out there. Some that are thick and lumpy can be more difficult to apply evenly and can do with some thinning out.
If you find your gesso is too thick you can dilute it with water … but not too much! Remember, acrylic gesso is already water-based so adding too much water could jeopardise its effectiveness. The maximum amount of dilution will depend on the density of your gesso.
In general, it is not recommended diluting with more than 15% water. It is worth noting that diluted gesso, whilst being easier, to apply will be more transparent.
Many artists do not like this and prefer a finish with high opacity. You should bear this in mind before deciding on whether or not to dilute or how much to dilute.
7. Squeeze Bottle vs Jar
Gesso is stored in either squeeze bottles or jars. A squeeze bottle is a good option for those who will be diluting their gesso as you can easily squeeze some out in your palette and mix with water. You may need to clean the nozzle after use to prevent it from clogging up – gesso does dry quickly!
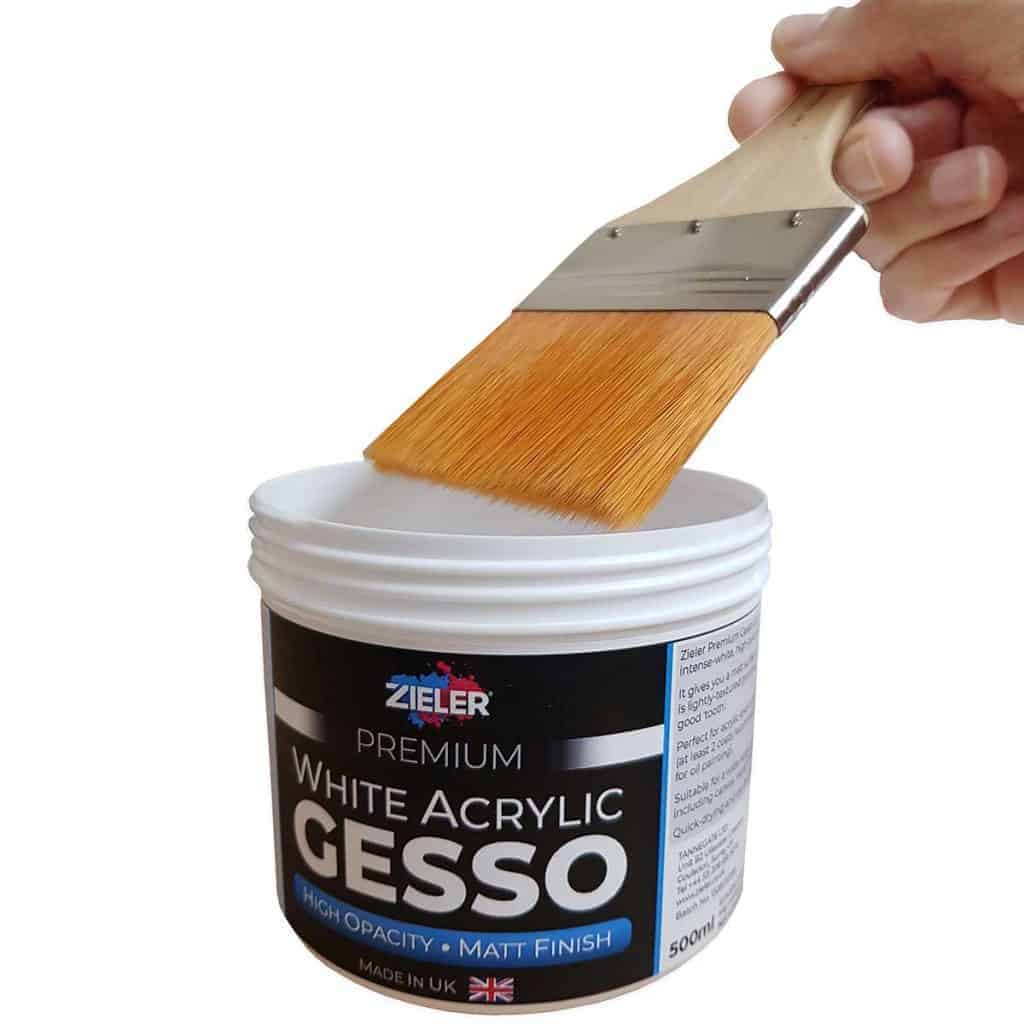
Buying gesso in a jar also means it can be diluted easily using a palette. But the jar offers an added advantage which many artists prefer: your brush can be dipped straight into the jar and the gesso applied immediately to your surface.
Tip: If you are intending to use a wide brush (which is recommended) ensure that your jar is sufficiently wide for your brush to dip in to.
8. Applying Gesso to Canvas
So now that we know why we should use gesso, how do we go about applying it to our canvas?
The actual gesso process is a short and simple one; however, there are a few things to note before you start.
Use a good quality brush that is not going to shed hairs. If you encounter any hairs in your gesso you can remove them with a pallet knife or any thin object.
Using a hard bristle brush for applying gesso may result in an uneven surface due to the strong, visible streaks that these types of brushes can leave behind. For a better finish use a soft nylon brush or even a foam brush (shown below).
Unless your surface is very small, using a wide brush is advisable simply because it’s going to be quicker! Let’s face it, priming your canvas is hardly the most enjoyable task.
To apply gesso to your canvas follow these simple steps:
1. Prep Surface
As you would when applying any type of wet medium, ensure that your surface is clean and free of dust by using a dry brush over it.
2. Stir Gesso
Whether you are using gesso straight or diluting it, stir it well (before and after diluting) using a pallet knife or an old kitchen utensil like a thin spoon or a blunt knife. This will give you a consistent mixture.
3. Applying the Gesso
Dip your brush into a generous amount of your gesso (but not that much so that it is dripping off the brush) and brush horizontally from one side of the canvas to the other (as shown below). Ensure you are brushing thinly so that any surface imperfections are smoothed over. Work your way down to the bottom of the canvas.
4. Allow the Gesso to dry
There is no hard and fast rule as to the drying time for gesso as it will largely depend on the density of the gesso, how much you have applied and your surrounding conditions. In most cases, the it should be touch dry after 30 minutes.
5. Smoothing the surface
After the gesso has dried you may notice some areas that need smoothing over. If so, you can very gently rub some sandpaper over any areas which are not smooth, but ensure the gesso is dry before doing so. Care should be taken not to sand all way through the gesso to the surface of the canvas.
6. Remove any Gesso dust
After gentle sanding, and using a dry brush, remove any gesso dust
7. Apply a second coat of Gesso
Apply another coat of gesso in the same way as above except this time brush the gesso vertically from one side of the canvas to the other (as shown below) in thin layers.
If you plan to use oil paints, then a third coat of gesso is recommended (brushing horizontally).
After all your layers are completed you should wait 24 hours before using your oil paints. This allows the gesso enough time so create the durable foundation that will withstand the vigour of oil paints.
Acrylic paints are gentle on the surface so they can be used as soon as your last layer of gesso is touch dry.
9. Applying Gesso to Wood
This can be done in the same way as canvas, but there are two important prerequisites:
- Your wood should un-lacquered and smooth – if it is neither of these you will need to sand it and brush away the wood dust.
- Your wood should be sufficiently protected against water (sealed) – this can be done with by brushing it with PVA glue. Once dry, any surface imperfections can be gently sanded away and brushed clean. You can learn more about how to prep your wood for painting
You can learn more about how to prep your wood for painting here
Once smoothed and sealed, your wood is ready for the gesso to be applied. It is recommended to have at least two layers of gesso for acrylic paint and three layers if you plan to paint with oils.
Gesso drying times are the same as on canvas.
Conclusion
So, there you have it. Gesso should be an important part of your art cupboard if you paint on canvas (even if it is pre-primed) or wood. Gesso is literally one of the main foundations that the quality of your artwork rests on. Yes, it is a few extra steps, but it’s well worth it for the more vibrant-looking and longer lasting results your prep work will give you.
You can save yourself some time by doing the following:
- Choosing a good quality gesso. Not only does this mean fewer coats are required, but the ones that are applied form a stable surface with a good amount of ‘tooth’.
- Using the gesso undiluted and straight from the jar. Diluting and mixing gesso are additional steps that may reduce the effectiveness of the gesso too. Find a quality gesso that is not too thick and apply it straight.
- Using a wide nylon brush so that more gesso can be easily applied in each stoke. Even the smallest canvas will be quicker to prime using a bigger brush. A nylon or foam brush will give you the desired smooth finish with less chance of having to sand.
Just as gesso provides worthwhile benefits before you paint, clear varnish is a simple and easy application that will protect and prolong the life of your finished artwork. To learn more here.