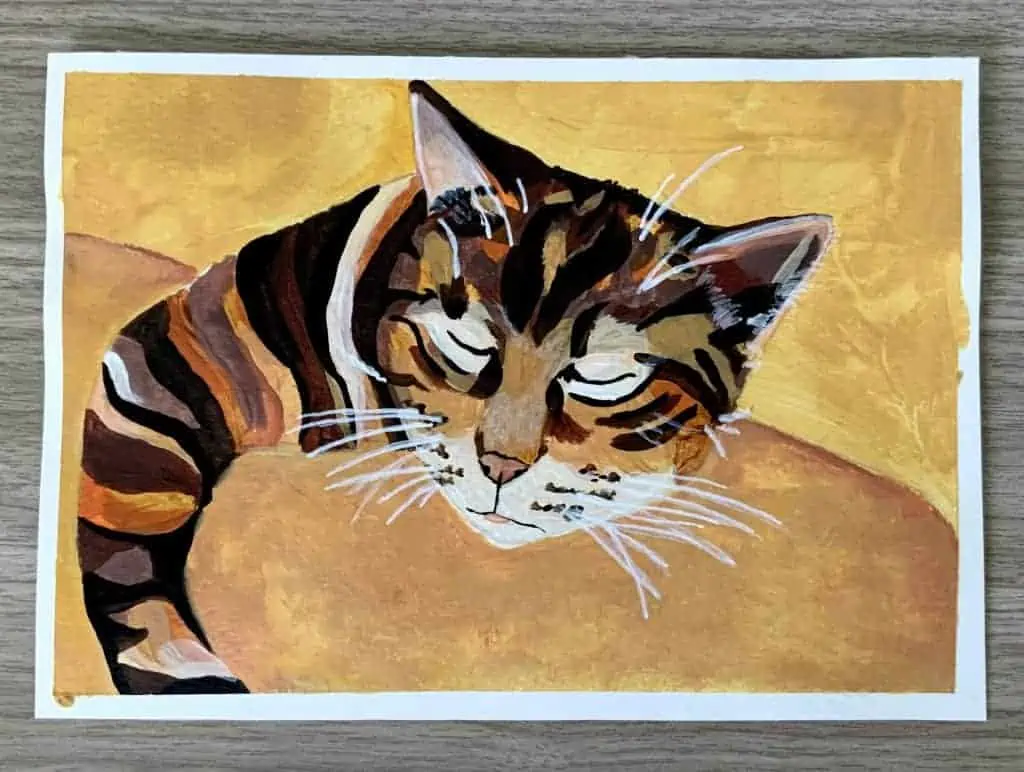
How to paint a cat with acrylics
Acrylic painting is fun and easy to do. It’s a great art medium for all levels of abilities.
This short beginners level guide to painting a cute sleeping tabby cat is easy to follow. With colour mixing step by step instructions so you can learn to layer your paints, adding dark and light tone to bring your painting to life.
This painting was created using the Zieler 24 pack of acrylic paints which comes with a great variety of coloured paints. This set is ideal for beginners because you don’t have to worry about mixing to many colours yourself.
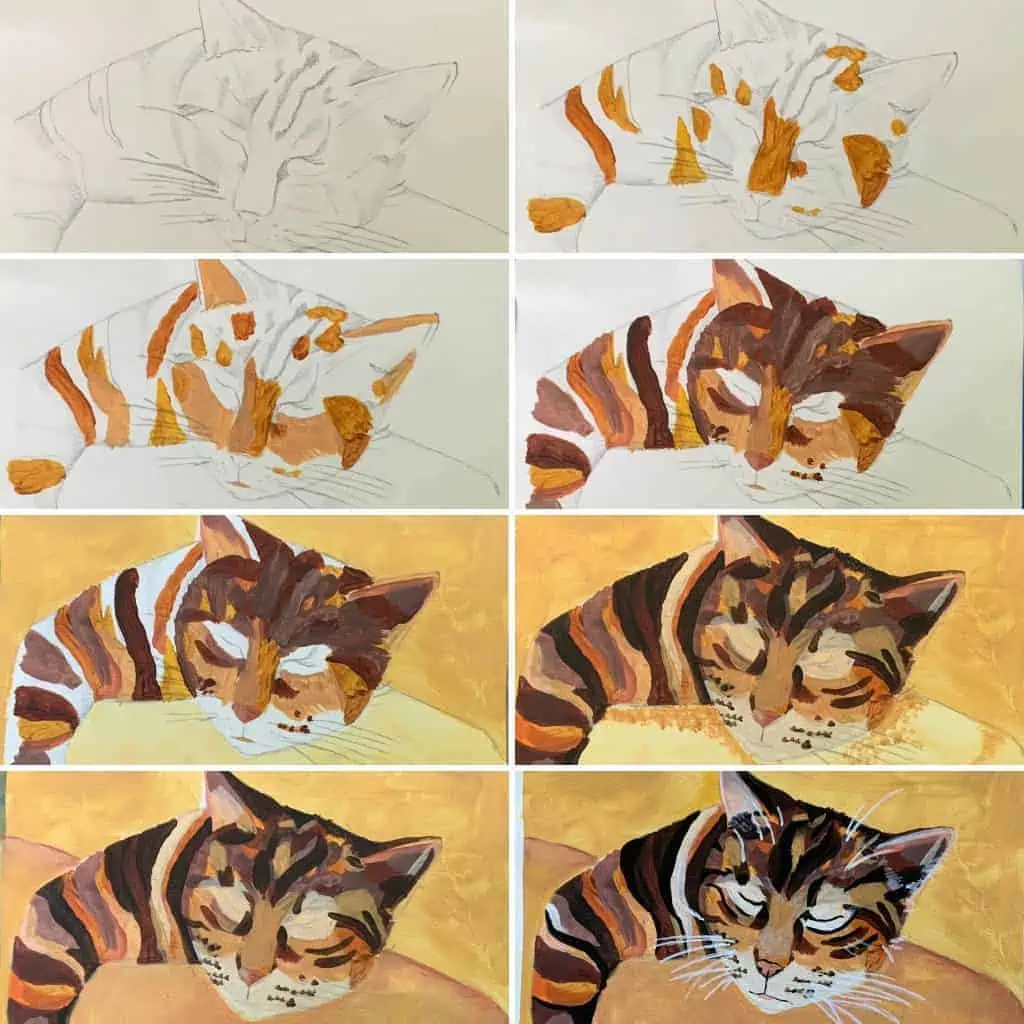
Starting off with a simple sketch or outline of your image, using a HB pencil draw onto your acrylic paper, remember if your a beginner or not confident in your drawing skills its ok to trace the image.
Layers and Tones
The painting is built up by adding different shades of similar colours, so you have your dark, medium and light shades. These shades are then applied in layers to create depth and definition in the fur.
With acrylic painting you can start by painting in the darker tones of that particular colour first. This doesn’t always mean the darkest colours. For example with this cat painting the ginger colours of her tabby cat fur are painted first, using raw sienna. Once dry then lighter layers of the ginger are added over the top, this colour is created simply by adding white to the raw sienna. This creates detail and depth.
So that shade of ginger is made up of two layers which are two different tones. A darker tone first, then the lighter one to add in some texture and depth.
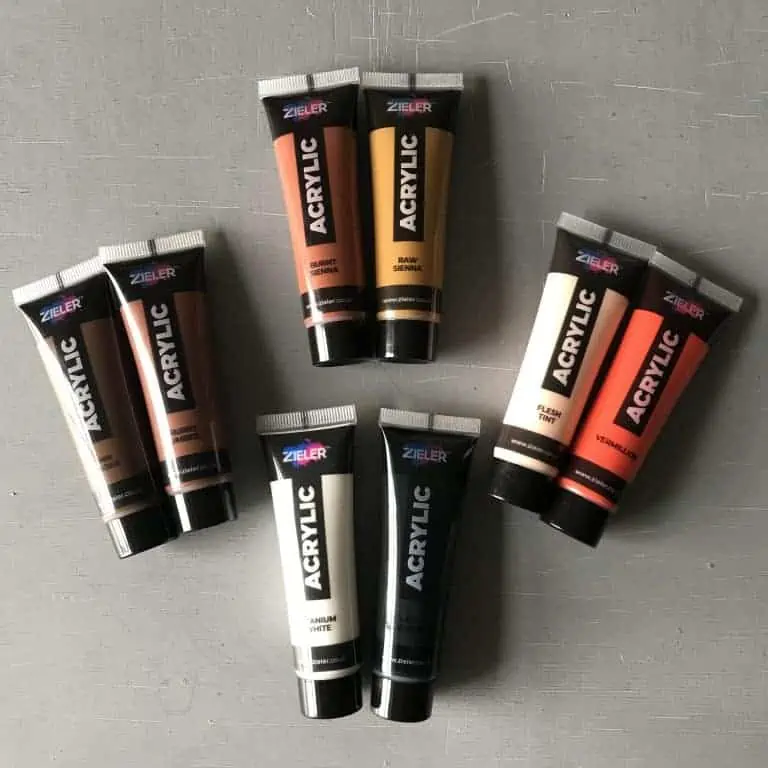
Mixing shades
To create a wide range of tones within the fur of the cat, do this by mixing browns in the following order.
The second colour is a mixture of raw sienna and burnt sienna. Painting in the colours of the tabby cat fur markings in blocks or basic shapes allows the painting to take shape, using your pencil lines as a guide.
The lighter colours on this project are made by mixing raw sienna with a bit of white. Then adding a bit of burnt sienna to build up to a darker shade of this colour.
For the medium brown, mix burnt sienna and raw umber in the same way. To make any of the browns a shade lighter add some white paint until the desired tone is reached.
Then for the darker browns mix raw umber with burnt umber. For the almost black or darkest areas of fur mix a little black into the burnt umber. Be careful when adding black, it goes a long way only adding tiny bits at a time.
Adding details
Adding the details creates definition and makes your cat come to life. When adding fine details its important to remember to let the first layers of paint dry so that the colours don’t blended and you get clean lines. Unlike when layering tones of brown for the fur this can be done wet on wet and the colours will blend slightly giving a nice textured look.
To add the features use the flesh tint colour for the ears and mouth area. Then add a little vermillion red with that for the nose.
Then you need to add the highlights this builds up the fur details and whiskers. Make sure you are using a clean and dry brush, use the white straight from the tube keeping it pure not letting it mix with other colours. Using a small brush with a steady motion to create the fine lines of the whiskers. If you are not very confident with your brush strokes then you can always use a fine tipped acrylic paint pen instead, this will give you more control.
Lastly for the extra fine details add in the black sections such as around the eyes and mouth. Use a size 0 round brush and be very soft with the pressure applied making sure you are not pressing to hard, this will help to create and ultra fine line. Or again you may find it easier to use a Fineliner pen.
Tip- If you make any mistakes acrylics are forgiving, you can leave it to dry then paint over the area. If you are covering up a dark colour with a light colour this might take a few layers. So be patience when waiting for layers to dry and remember practice makes perfect it might not turn out perfect on your first attempt.
See the process in this time-lapse video
See more creative guides here
Paint By Numbers Guide: 9 Steps to Creating Your Masterpiece
Paint By Numbers Guide: 9 Steps to Creating Your Masterpiece Table of Contents Welcome to the world of paint by numbers! This fun and
9 Things You Should Know About Gesso
9 Things You Should Know About Gesso and How You Should Use It Table of Contents 1. What is Gesso? If you are starting out
An Introduction to Acrylic Paint & How to Get the Best From It
An Introduction to Acrylic Paint & How to Get the Best From It Table of Contents Loved by artists and crafters all over the world,
Acrylic Varnish Spray: The Best Way to Protect Your Art Paintings
Acrylic Varnish Spray: The Best Way to Protect Your Art Paintings Table of Contents As an artist, we know you have taken great time and

30 Minute Masterpiece – Still Water Reflection
Still Water Reflection Welcome to the 30 Minute Masterpiece with me Trish Green – Artist Ambassador at Zieler. I am a self-taught artist aiming to
Art Portfolio Presentation Case – Product Guide
Zieler’s Art Portfolio Presentation Case & Art Folder – An All-In-One Solution! Imagine an art case that can double up as a portfolio case. One


