The Ultimate Colouring Pencil Guide
Table of Contents
Learn how to use colouring pencils with Zieler artist ambassador @bishandbow_art.
Colouring pencils have become increasingly popular. This is due to the start of the adult colouring trend. There are so many variations available its sometime hard to know where to start. Whether your a budding artists just starting out or an artist interested in trying colouring pencils. In this guide we aim to answer the questions most asked by people when looking at starting with colouring pencils. In this guide i will help you learn how to use colouring pencils.
What is the difference between coloured pencils and watercolour pencils?
To start off with one of the most commonly asked question is about the types of coloured pencils. For example. What is the difference between coloured pencils and watercolour pencils?
Coloured pencils.
Non water colour pencils are made up of pigments which create the colour. Waxes and glue like binders all mixed with a variety of smaller particles such as clay make up the rest of the core of the pencil.
The waxy consistency will vary between different brands and quality level of pencils. For example the Faber-castellated coloured pencils contain a vegetable oil or soy bean oil in its Polychromos pencils, where as Caran d’ Ache Pablo and Luminance pencils all contain wax to give them a soft smooth glide application.
Grade or quality level of pencil.
The vibrancy of the colour are dependent on the quality of the pencil, generally the artist quality pencil will contain a higher concentration of pigment. This give them a brighter more opaque finish in comparisons with a beginners grade pencil.
Coloured pencils that are harder like the ones designed for beginners tend to be dipped in a wax making them slightly harder. These are perfect for crisp, hard lines. As the pencil is dipped in wax it still retains the same glide application. A great example of this is the Derwent studio pencil designed for the student or beginners level. It’s a very hard pencil but still glides and blends well.
Watercolour pencils.
Water colour pencils look and feel like normal coloured pencils they are soluble so create a watercolour painted effect. Adding water to the pencils and can be done in different ways. The core of a watercolour pencil is pretty much the same as a coloured pencils containing the waxes, pigments, additives and binding agents. The main difference is the binding agents not a glue so react in water meaning they are soluble. Water colour pencils are not normally dipped in wax to make them harder. Our watercolour pencils are a good example of a hard pencil that hasn’t been dipped in wax. See the link for product information.https://www.zieler.co.uk/product/watercolour-pencil-set-with-felt-wrap-set-of-24-by-zieler-09290047-clearance/
Watercolour pencils have a transparent finish with soft delicate colours.
How to blend colours.
Now we are going to move onto how to use coloured pencils. Here we show you how to blend coloured pencils in a variety of ways to create different effects.
Normal or standard colouring pencils can be blended in a variety of ways to create tone, mixed colours and textures. Burnishing with coloured pencils which involves layering of colours this creates depth of colour, tonal range and textures. Burnishing cant be achieved with watercolour pencils.
Colour mixing using the burnishing method is easy to do. Firstly you apply one colour then layer it with another overlapping the colours. Coloured pencils are not completely opaque so that the layers underneath show through. This makes the colours combination of the colours created a blended effect. See image below for an example of blending red and yellow to make orange.
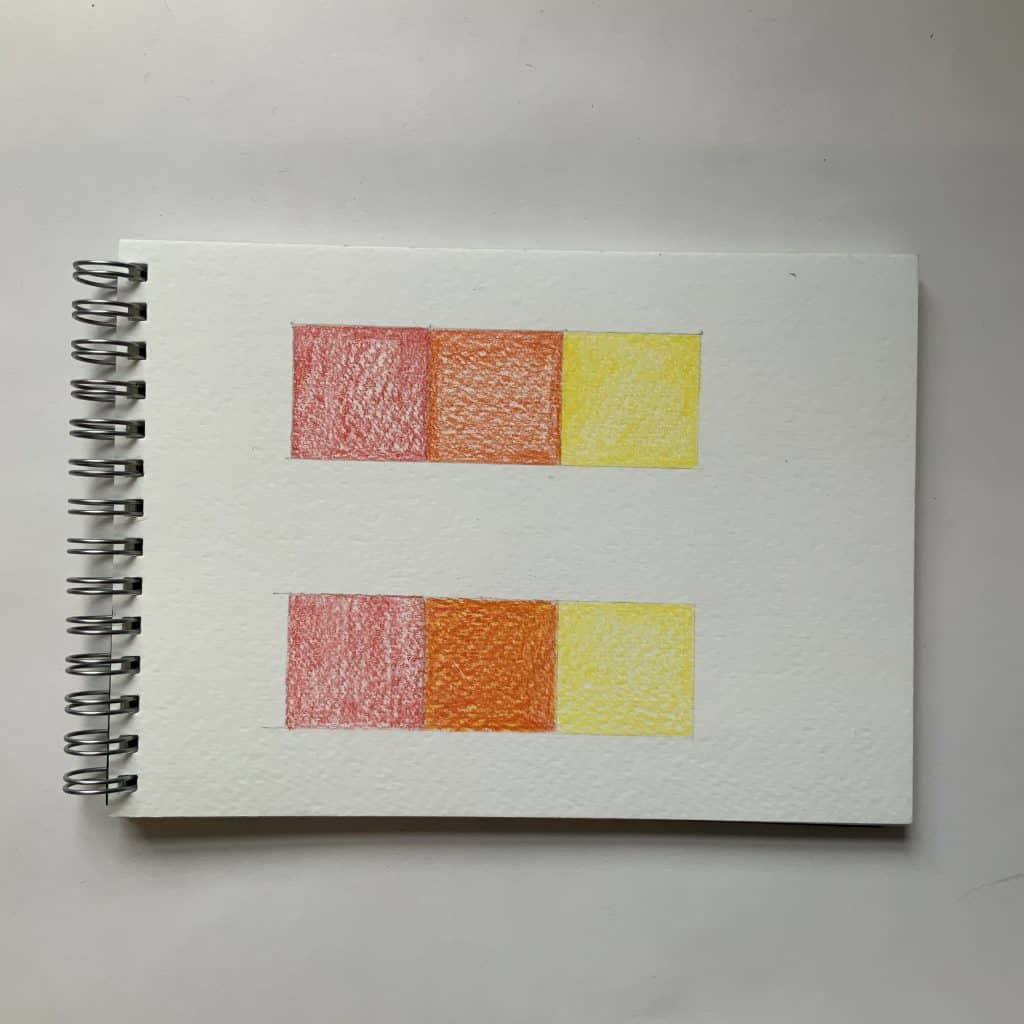
How to blend colours using colouring pencils. Top image shows simple colouring with three colours. Red/orange/yellow. The bottom image is red and yellow with them layered in the middle to make the orange colour.
Colour blending can be used to create a wide variety of colour combinations, tone or contrast as well as creating textures. Colour mixing and blending with colouring pencils can also be achieved by adding solvents such as baby oil, rubbing alcohol or Vaseline.
How to create texture with coloured pencils.
Grated pencil.Coloured pencils can be grated to make a powder that can be applied to the paper with a brush, mixing different colours this way will give an extremely fine and light texture. This method is popular for large areas, background and in portraits the soft skin of children.
Scrapping
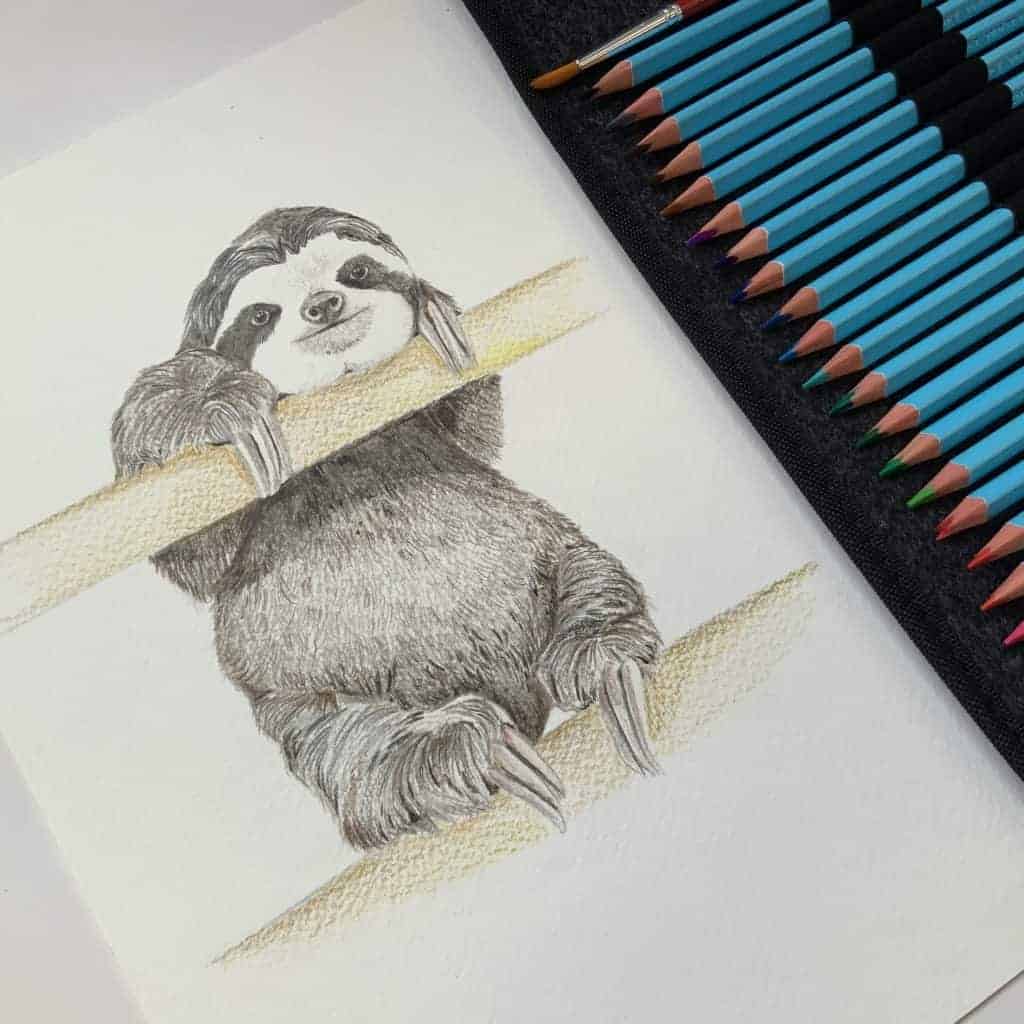
Sgraffito. Scratch or scrapping into layers of coloured pencils, this method is similar to the art of scraper foils in crafting. The best pencils for this are the ones containing oils as they have a soft creamy finish. For example the Faber Castell that contain vegetable oils. This method is widely used for foliage, hair and fur. For instance take a look at this lovely little sloth image with super detailed fur.
Rubbing
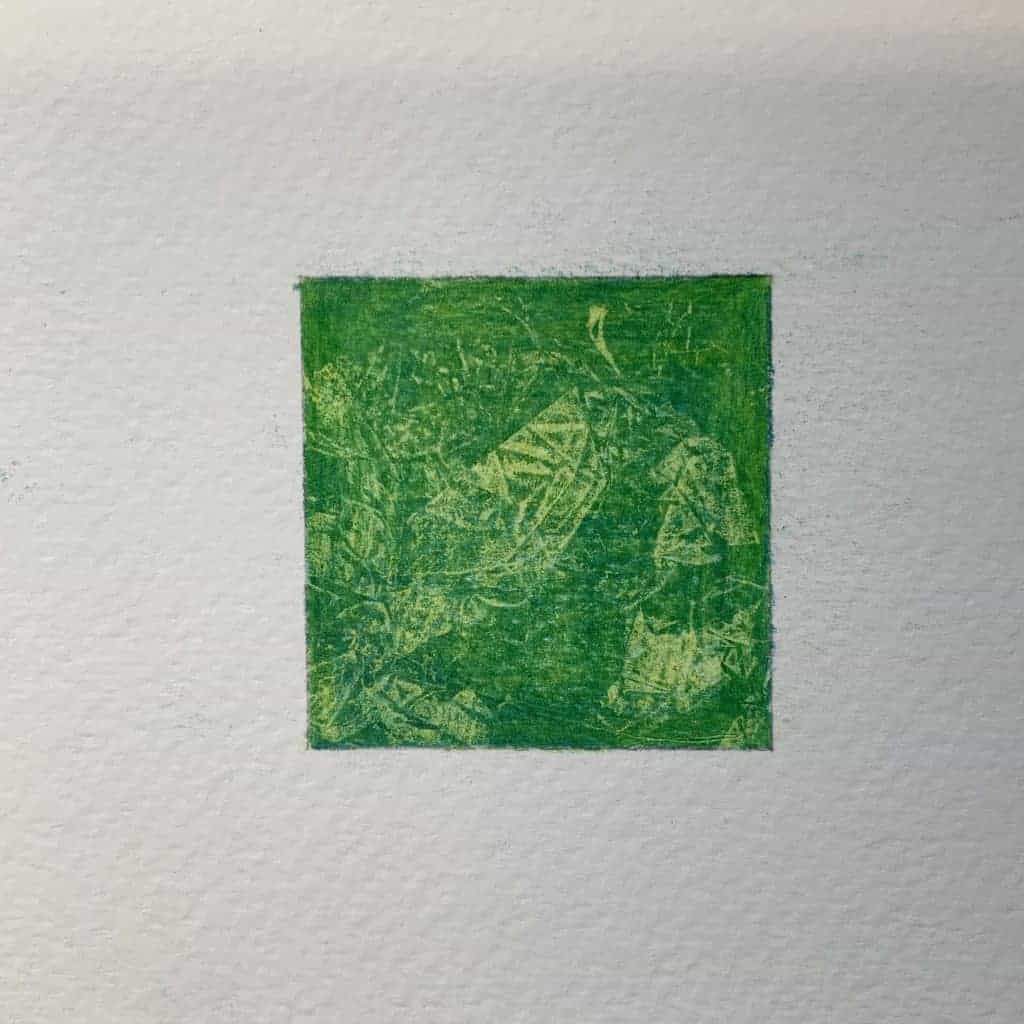
Frontage. Just like rubbing such as leaf rubbing or brass rubbing, start by placing a piece of paper on top of the chosen texture and using a coloured pencil colour over the top, for example a leaf or garaging piece of wood. The harder hobbits level pencils work really well for this technique.
Dabbing
Mottling. This is often known as dabbing or speckling techniques. This is the removal of colour using tapes and erasers, the tape removes some of the pencil from the page . It can be achieved using masking tapes in strips for neat lines or rolled up to create crinkle like texture. This technique is great for recreating textures in fabrics or rocks. Simply remove a section of tape and apply it over the top of coloured pencil then press down. Then remove the tape and reveal the texture effect.The best way to create texture is to use the tape over layered or burnished pencil.
A kneadable eraser will also give the same effect although it works better in graphite pencil in comparison to coloured pencils. Mottling is also a great way to correct minor mistakes.
How to create tone with coloured pencils.
As with all drawing mediums there are several ways to create tone, here we explain the different techniques that can be applied when learning how to use coloured pencils.
Pointillism. This is the art of using dots to create tone. The closer together the dot the darker the area this also apples to the quality of dots the more dots in one area the darker the effect. See image below.
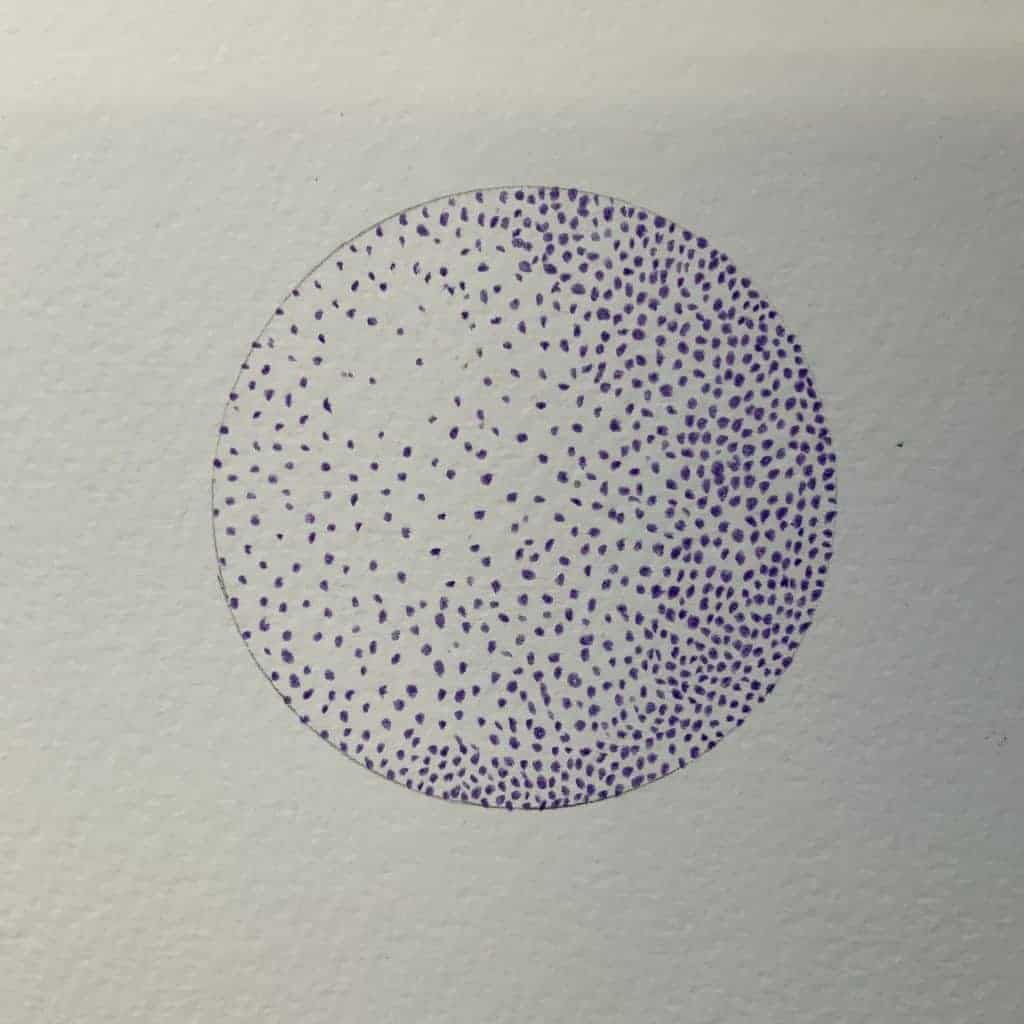
How to use coloured pencil dots to create tone in your drawings
Coloured pencil tonal sphere example image using Zieler colouring pencils. https://www.zieler.co.uk/product/wooden-drawing-36-pc-complete-gift-set/
Liner. This is using lines to define tone and direction of shape. Start by Drawing lines using larger gaps between the lines. Then by changing the distance between the lines you can creates the dark and light areas and the direction of the line create the shape. See image below.
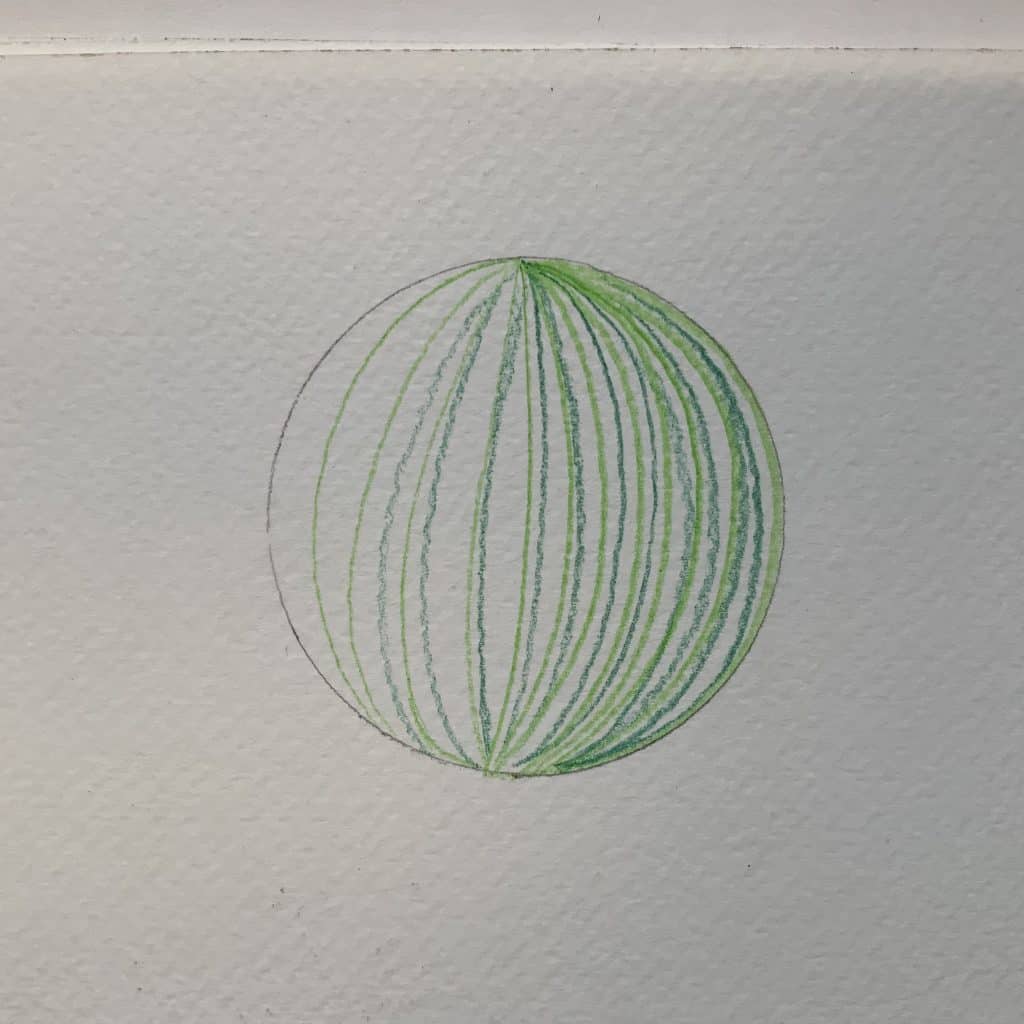
How to use Colouring pencils. Tonal sphere liner example image
Cross hatching. This is using layers of lines that run in different directions to create light and dark areas, the more layers the darker the area. See image
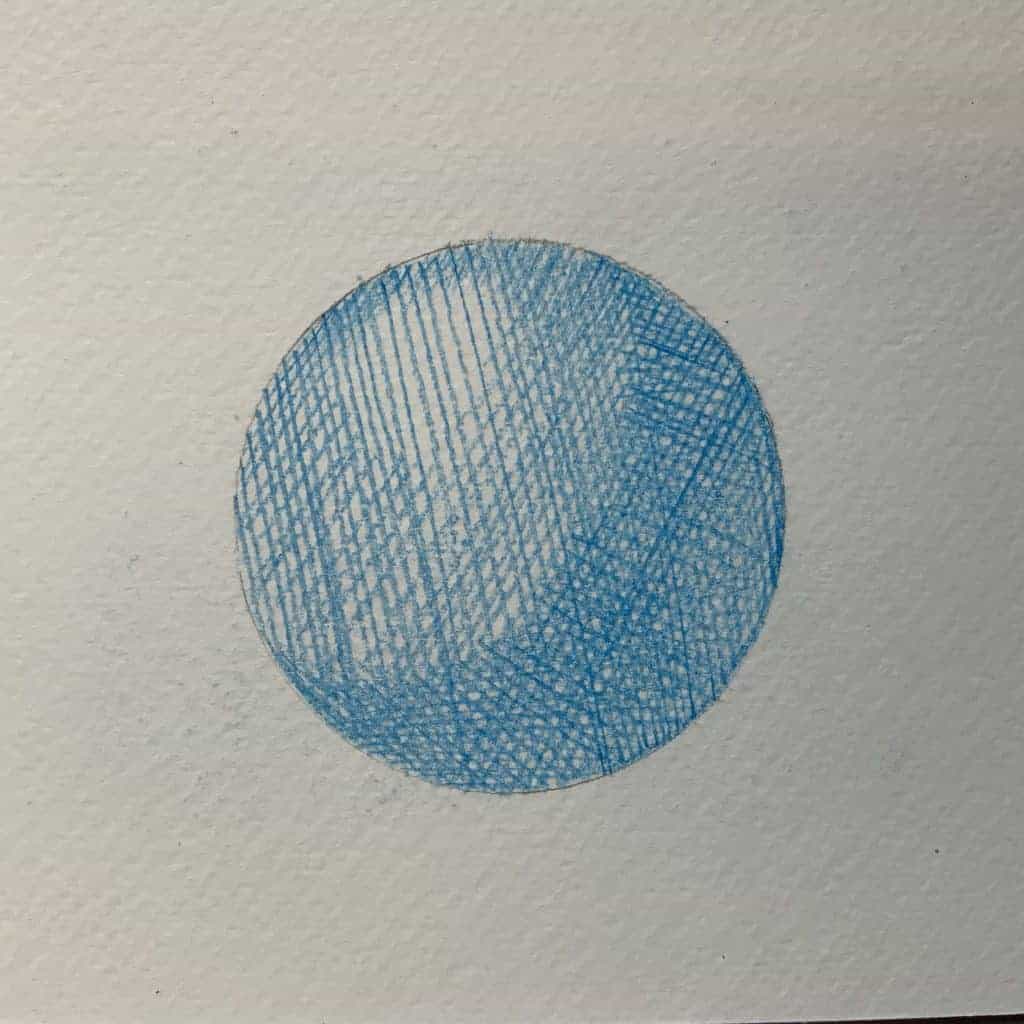
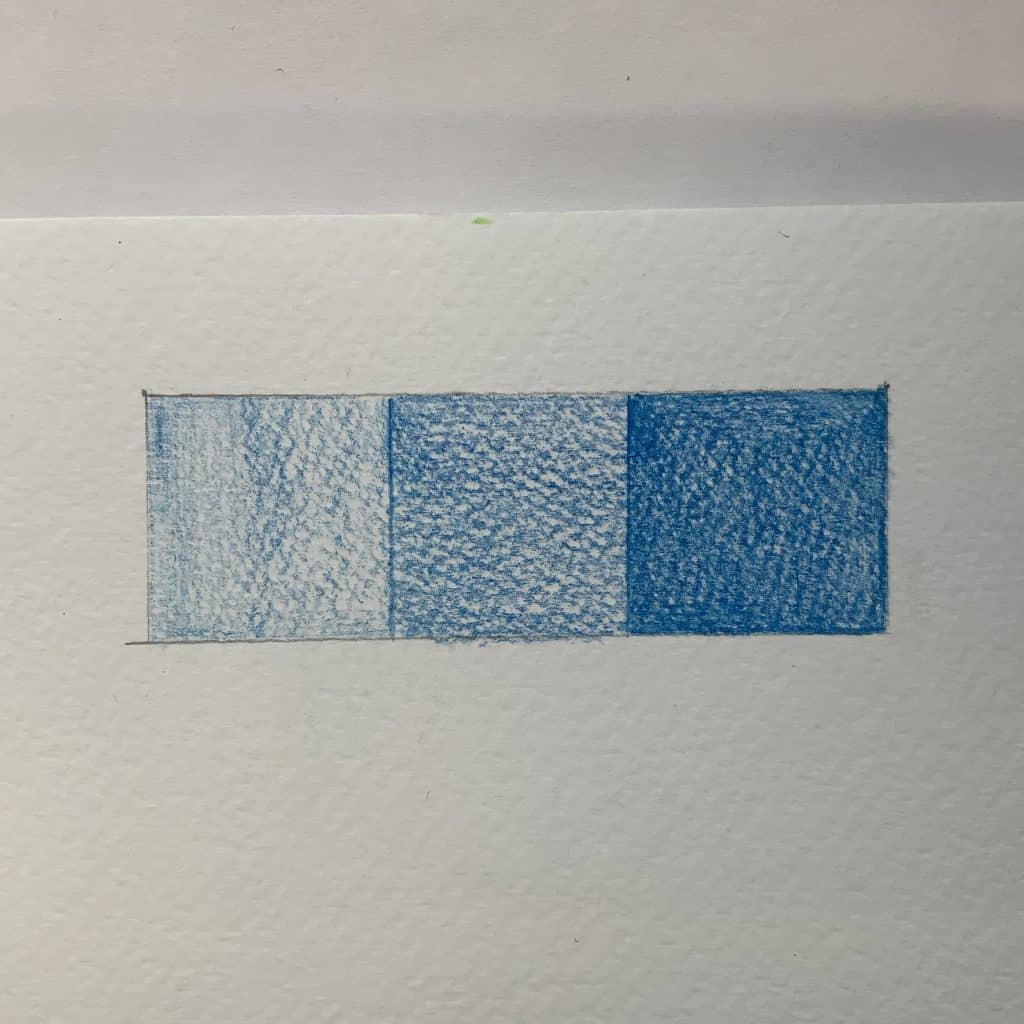
Pencil pressure. By applying different pressures to the pencil you can achieve different tones. For example Pressing using Soft or light pressure for lighter tones and heavier pressures for darker tones.
Getting started.
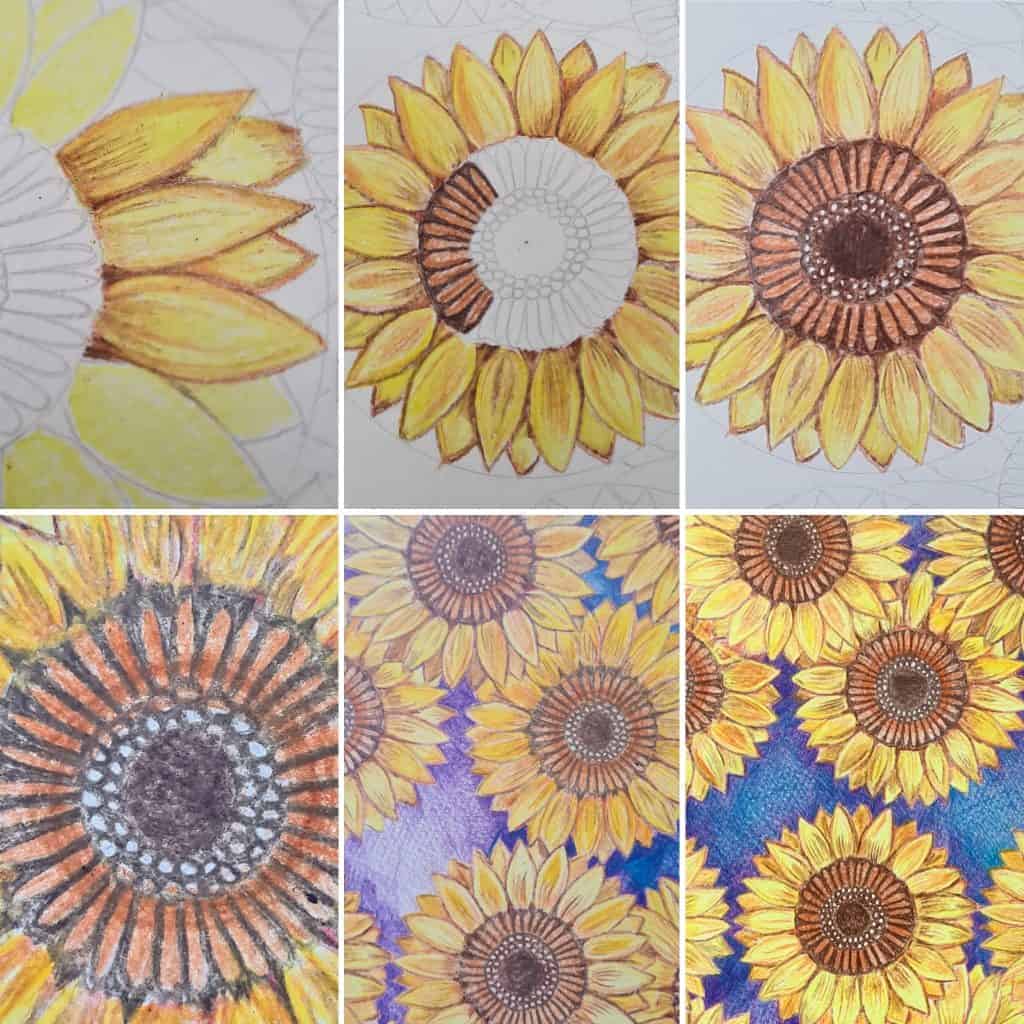
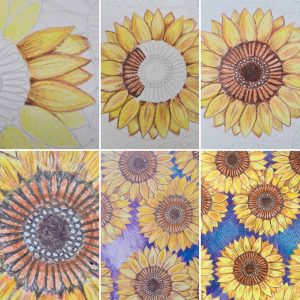
Starting with colouring pencils. When starting your colouring it’s important to remember to build up the layers of colour. Start with the lightest colour first and keep layering building up to the darker colours. In the case of smooth papers they take less layers but with textured papers they can hold more layers with the pencil getting into the tooth of the surface. In the example below I start by colouring the petal with a yellow, then I outline the petal with an orange. Next to add shape, colour and tone I used a dark brown to draw on the folds in the petals.
Watercolour pencil blending.
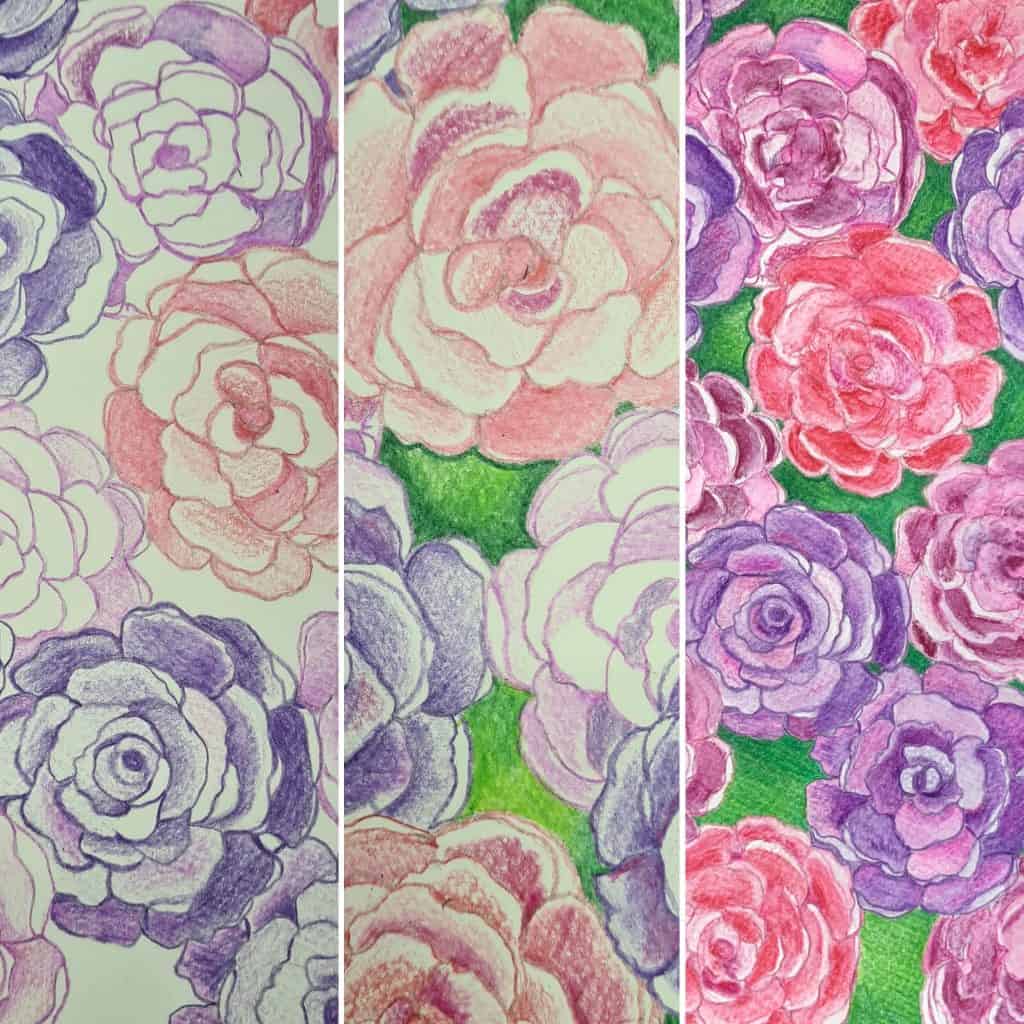
As with colouring pencils always start with the lightest colours when using watercolour pencils. Blend the colours by applying water in between layers or after layering colours. As watercolour pencils are harder and don’t Blend the same way it’s best to blend colours gradually. For example The image below Shows you how i start with light purples and pinks for the first layer of the petals. Then i add a darker tone of pink and purple over the top and in the inside of the petals which will give is shape and dimension. Lastly i add water to each petal blending the colours together. In this example i added water to the inside edge of the petal and worked the water outwards.
How to mix the two different pencils.
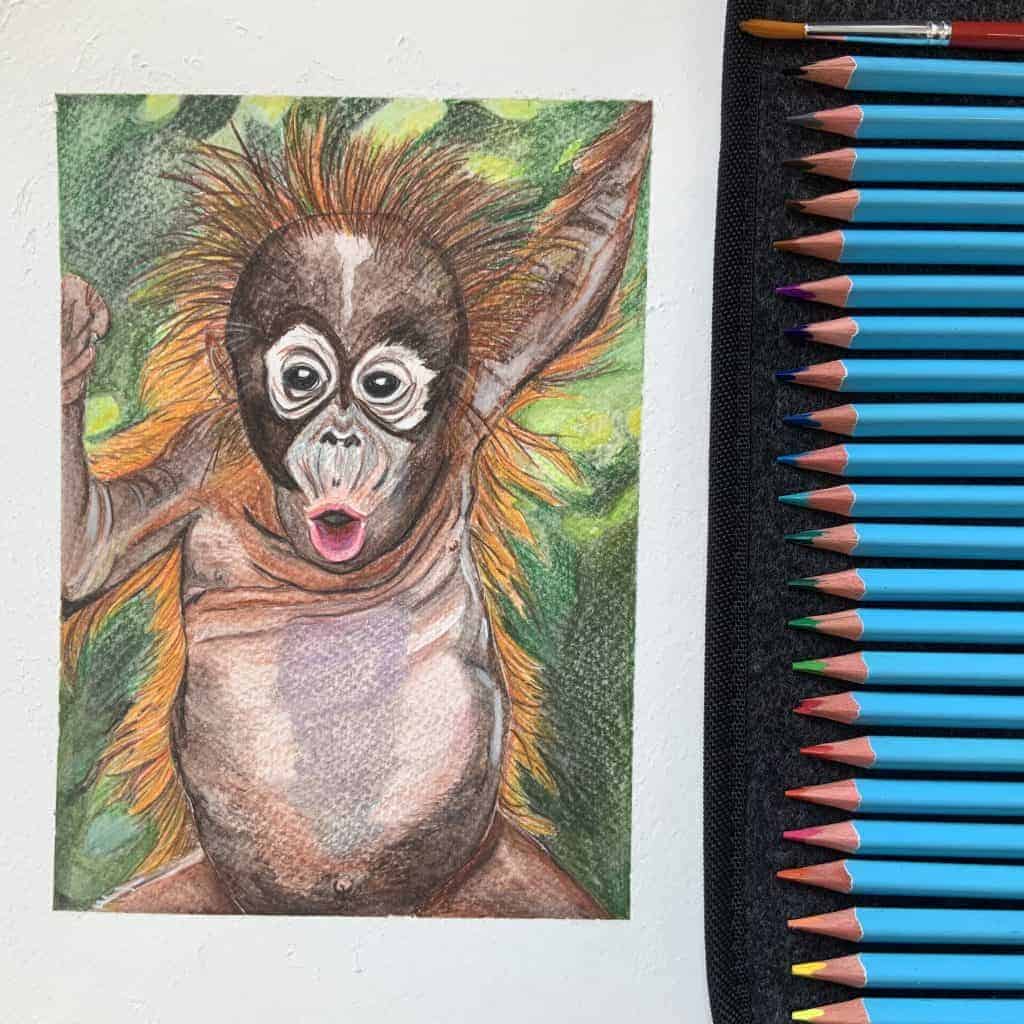
Buy mixing the use of colouring and watercolour pencils you can mix a variety of techniques depending on what your subject matter is. In the example below I’ve used watercolour pencils for the background and body and normal colouring pencils for the details and fur. As you can see from this example using a textured watercolour paper had helped create the skin texture on the baby’s body. This has been coloured using layers of pencil applied with a light pressure so that the tooth of the paper is still slightly visible.
Top tips.
Top tips when using colouring pencils
1. Keep your pencils sharpened is important. It may seem a simple tip but its important when creating lines and building up colours.
2. For a professional looking finish Use masking tape to create boarders on you papers.
3. Experiment. Have fun and play around with different techniques until you feel confident to start a piece.
4. Using a scrap piece of paper to practice colour blending and layering helps when you are learning.
5. When using normal colouring pencils with watercolour pencils always make sure the water is dry before adding the details.
6. If you don’t feel confident in your drawing skills, both types of pencils can be used in colouring books. These are a great way to start your colouring pencil journey.
Finishing off.
By combining the techniques I’ve shared and following the top tips I’m sure your be well on your way to creating your own masterpieces. Now its time for you to get creative and remember you can follow us on our social media platforms for regular arty posts and inspiration.
How to use colouring pencils.
The Ultimate Colouring Pencil Guide Table of Contents Learn how to use colouring pencils with Zieler artist ambassador @bishandbow_art. Colouring pencils have become increasingly popular.
How to use Duo Tipped Brush Pens
Beginners Guide for Duo Tipped Brush Pens Duo Tipped Pens In this guide we show you some top tip for using brush pens. Outlining different
Mindfulness Mandala Drawing
Mindfulness Mandala Drawing A step buy step guide to creating beautiful mandalas. Drawing Mandalas can be really relaxing and therapeutic. We are at a time
How to use Fineliner Drawing Pens
Beginners Guide for Fineline Drawing Precision & detail The pack 12 Zieler fineliner pens are ideal for drawing, sketching, illustration, technical drawing, journaling, art, writing

Pencil Grades
Pencil Grades Want to know what is the right pencil to use? Lots of people get confused about the way pencils are graded. Don’t worry
Beginners Guide to Watercolour Pencils
Beginners Guide for Watercolour Pencils Pencil techniques Watercolour pencils are really versatile and easy to use, the great thing about them is that you have

