Lino Printing Project Ideas

Greetings Cards
Making your own cards is one of the simplest and most effective printing projects. Buy ready-made, blank cards and envelopes, cut the lino to your personalised design and print unique greetings cards.
You will need:
Blank greetings card with envelopes
a block of lino the same size as the card
relief printing ink such as the one in your kit
images or photos as inspiration for your design
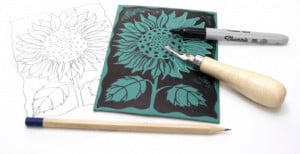
Step 1 – Decide whether to print your cards portrait or landscape style. Choose whether your card will have a border around it or whether the image will go right to the edge of the card. Draw your design on paper as usual and transfer to the lino.
Step 2 – Cut the image in the lino. Remember, what you cut away will be white in the finished print; what you leave as lino will be printed in black.
Step 3 – Prepare your printing table as above. You will not need to make a registration sheet. Simply place the lino face up on some newspaper and apply a good coat of ink. Transfer the lino to a clean sheet of paper. Wipe your hands. Take a blank card, check which way round to bring it to the block. Line up one edge of the card with one edge of the lino, lay the card down onto the lino and rub over the back of it with the wooden spoon as usual. Peel back the card to reveal your unique design! Lay flat or hang to dry.


Stamp Making
Included in your kit is everything you need to make decorative and versatile stamps. You can make gift tags, wrapping paper, cards and embellish many other items with a personalised motif.
Step 1. Take a lino disc, draw round it on plain paper then draw your design within that circle.
Step 2. Transfer your design to the lino disc using tracing paper or copy it free-hand. Remember that your final image with be reversed when printed. If you include words, they will need to be drawn in mirror image on the lino.
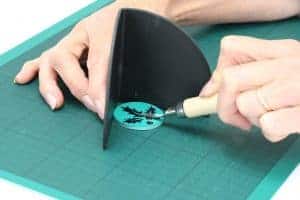
Step 3. Cut the design.
Stick the disc onto the stamp holder by removing the backing paper and pressing the disc firmly onto the recessed base of the holder.
Step 4. Prepare your printing area as normal. Apply ink to the stamp with the roller and print your chosen items.
Two-colour Print
You can make a two-colour print either by using the ‘reduction’ method where one block is cut a little more after each new colour is printed or by cutting two separate blocks, one for each colour. This is described below. You will need to purchase relief printing ink in more than one colour.
Two-Colour Print using Two Blocks
Step 1. Prepare two lino blocks, identical in size. Draw your chosen image on paper, paying attention to which areas will remain white, and which will be printed in the two colours. In my example, I used red and brown inks on white paper.


Step 2. Trace off all parts of the image in the first colour (in my case, red). Transfer these parts of your image to the first lino block. Then repeat the process for the second colour, using the second lino block.
Step 3. For each block, cut away all lino other than those areas which will be printed in the required colour. So, you can see that in my first block, I cut away all lino except the robin’s breast and the holly berries. In my second block, I cut away all lino except the brown areas of the robin and the twigs.
Step 4. Before printing, make a registration sheet as described above. This is especially important for a multicoloured print as we want the colours to line up correctly in the final print.
Step 5. Decide how many prints to make, print the first colour on all sheets of printing paper. Once this is dry, print the second colour, making sure to place the paper the right way around and lining it up with the guide on the registration sheet. Hang prints to dry as normal.


Introduction to Lino, Printing Guide
Introduction to lino printing Setting up for printing Cover your work area with newspaper and set up the equipment as shown below. This set up

Introduction to Lino Cutting Guide
Introduction to Lino Cutting SHOP FOR LINO Your Lino Kit Contains Soft Lino, Cutting Tools: handle, 5 blades, blade removal stick, Roller (brayer), Hand Guard, Ink Tray, Ink, Instruction Leaflet, Stamp Holder, Pre-cut

Pencil Grades
Pencil Grades Want to know what is the right pencil to use? Lots of people get confused about the way pencils are graded. Don’t worry

Beginners Guide to Watercolour Pencils
Beginners Guide for Watercolour Pencils Pencil techniques Watercolour pencils are really versatile and easy to use, the great thing about them is that you have

Beginners Guide to Watercolour Painting
Beginners Guide to Watercolour Painting Styles There are a few different techniques you can use for watercolour which equate to different styles of painting. If

Brush Techniques
Beginners Guide For Brush Techniques It’s important to have a variety of brushes in different sizes and shapes, so you can achieve desired textures. Here

